OUGD603 Evaluation
Completing briefs before the Christmas break put me in a really good position for the rest of the year. I put this down to good project management and time tabling which allowed me to manage my time effectively between numerous modules and projects. I had to adapt my briefs and time plan because I was on placement for a long time. This meant that I had to sacrifice some personal briefs in order to make sure I completed the tasks for Oslo Agency to a high standard. I intend to pursue these briefs after the course.
Working on live briefs throughout the year forced me to imbed professional awareness into my outcomes and concepts. I succeeded this through creating the lunar calendar as the outcome was prepared and sold to the public through my own personal website as well as Intern. Other live briefs such as Future Humans and Ideal Physic were great to work on and provided valuable experience for preparing a brand and identity document within the industry. Synthesising my practice by taking influences from my COP3 module which gave me knowledge of publishing and artists books. This influenced my briefs to pursue editorial and book design. I don’t think the final outcomes for my large briefs such as the agricultural research brief reflects the amount of time, effort and planning that I did throughout the entire year. However to overcome this the best thing is to just do it. To reflect on this, I was surprised that I actually enjoyed the short briefs as I was more focused and objective with my design decisions and production.
During the module I was able to identify areas of design that I feel passionate about moving forward to graduation. Working manually with traditional printing processes is something that I aim to pursue in the future and I have identified a variety of studios around the UK. Enjoyed print orientated briefs - more sense of achievement and you can physically hold it and I think that is reflected throughout the entire module. Within my initial statement I intended to complete digital briefs to increase my confidence in design for screen. I have successfully collaborated with a digital designer which was really beneficial for building a well rounded knowledge of digital and print creative processes.
I realised that my passion within design is for print media, however I am glad I completed the digital orientated briefs for the sake of my portfolio. This has by far been my favourite module of the course as I had complete control of the direction of the briefs.
Monday, 14 May 2018
OUGD603 - Univers - Final Outcome
Binding
The final publication has been bound using 32mm ring binders.
To create the holes for each bind we created a template that can be placed over each individual sheet to register each hole. To achieve this we used a 5mm screw punch. We punched the holes 2cm into the inside margin to give the pages room and create a smooth page transition.


Using ring binders provide the flexibility for the owner to reorder the publication, take pages out and put it on their wall and also add pages in.
Cover page
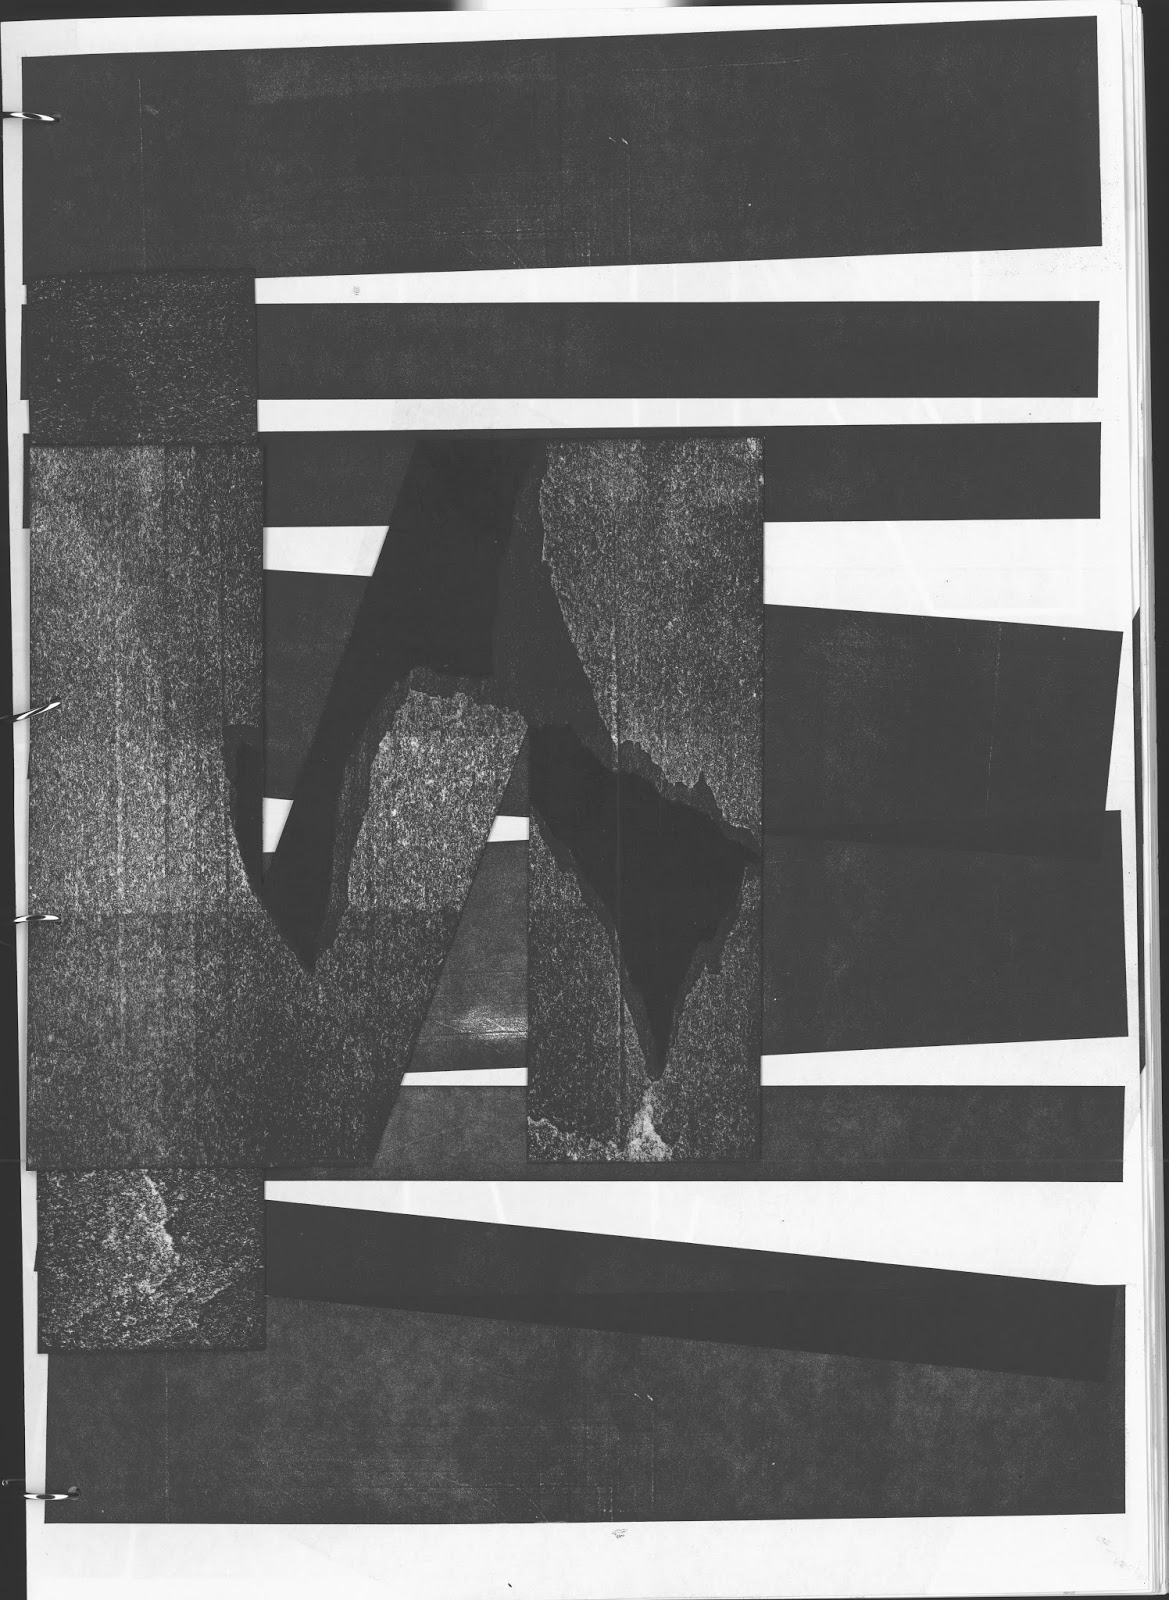
Digitally printed contents page with Univers Extended Black 'U' overlayed in mount board:

Screen Print

Spray mounted some of the sheets of tissue paper that we used to register off certain areas of the typography during the letterpress process.


Bound each letter from 'univers' throughout the publication to overlap the content.
Letterpress
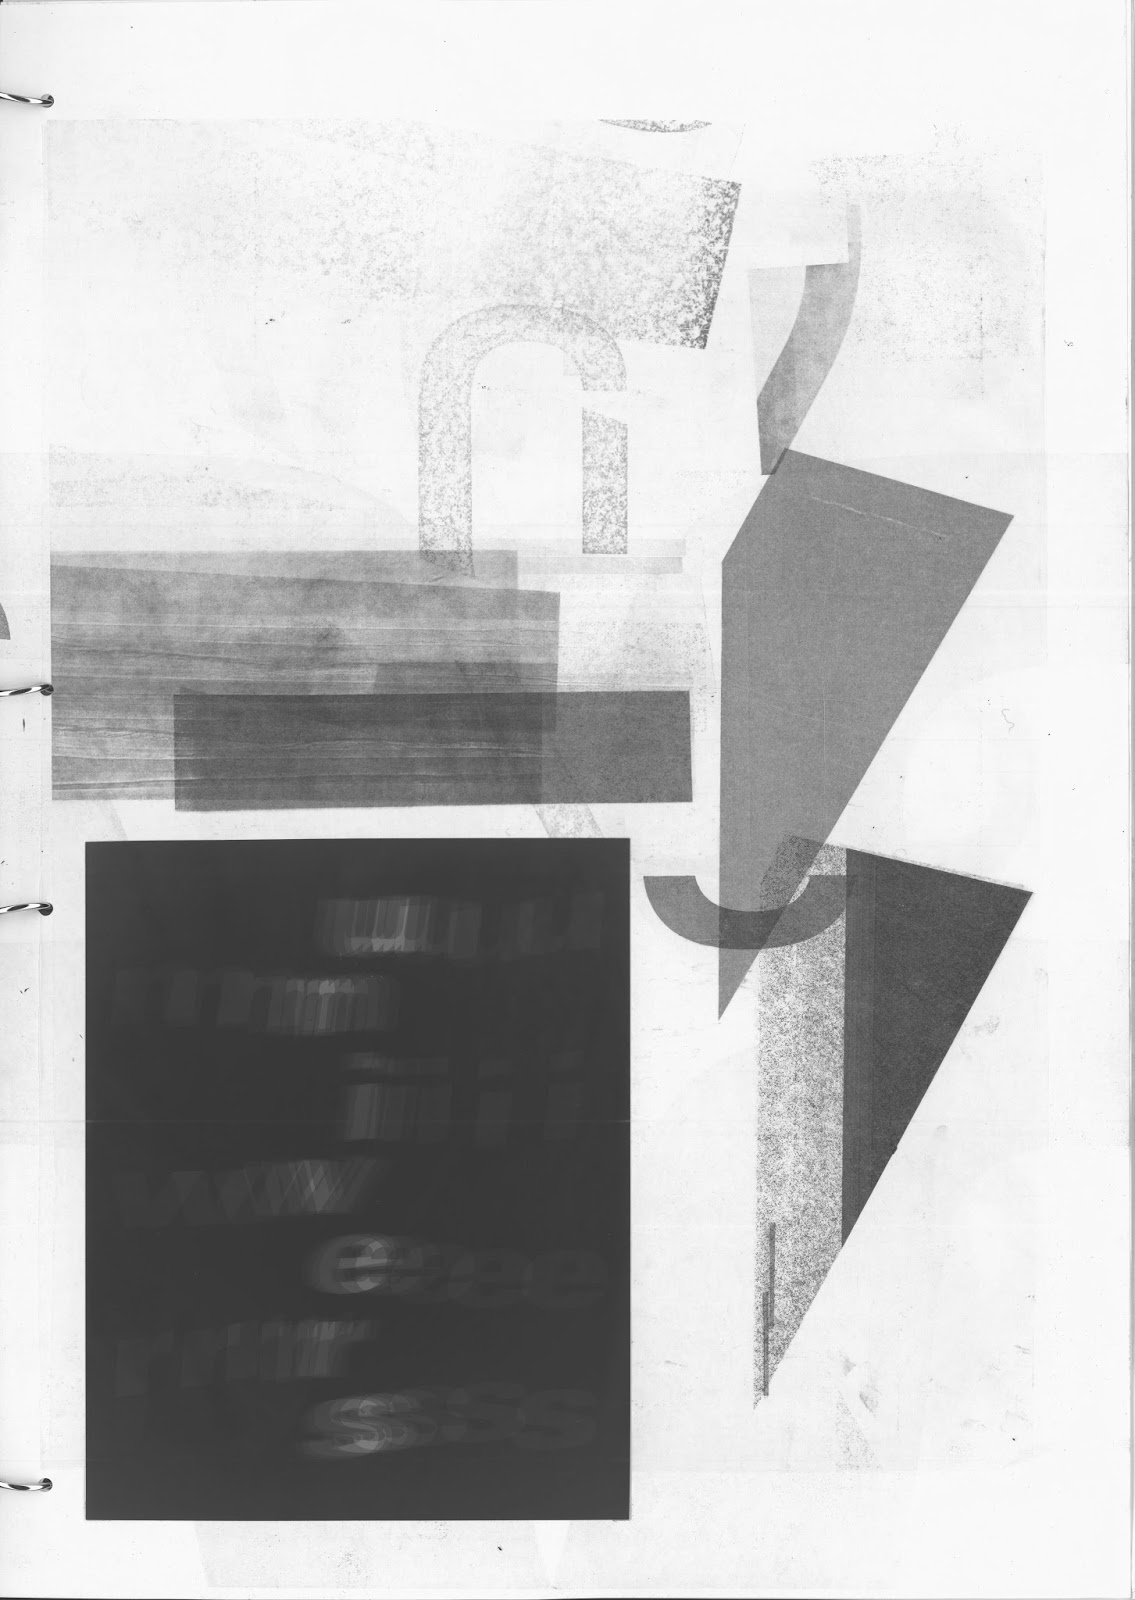
Deconstructing the mountboard type:

Spray mounted the photograms directly into the publication. The dense blacks and highly defined type contrasts with the rough aesthetic of the letterpressed letters.

Bound the 'V' into the publication which has been overlapped onto a 'V' composition:

Same with the E:

Spray mounted two photograms onto the page. Overlaid tissue paper to further reiterate process. We sprayed the tissue paper horrizontally down the middle to force the user to fold the tissue paper un and down to reveal the photograms. This highlights the experiential impact of print media and encourages exploration. Each time the user looks through they are likely to discover something new.

Tissue paper off prints alongside motion photogram:
Bound the deconstructed and abused R into the publication:

Composition of 4 photograms used to illustrate space:

Bound the printing plate over the original print:

The oversized publication is what makes it so unique
OUGD603 - Univers - Cover Design
3mm grey board - Rough, organic textures to communicate process
The hard cover will protect the original prints whilst keeping them flat.
Although we haven't been able to print using the wood type, we intend to use it for dry debossing into grey board. This will create subtle indents in the cover, reinstating the experiential nature of printed matter.
Began by sorting the variety of weights and styles:

One concept was to deboss each character from 'univers' in every weight and size to provide an overview of the entire typeface.

We realised that we were missing some characters from using it in the dark room.
In order to demonstrate the variety of weights and styles we created numerous typesetting compositions:

Created 7 final type compositions and manually set them onto the A2 sheet of grey board:

We made sure that we set the type in reverse formation so that when it has been debossed it will be the right way round.
Test Press 1:
Applied a lot of pressure to the greyboard using the albion press, however the greyboard was too dense which meant their was little indentation.
Test Press 2:
To overcome this we decided to soak the greyboard in water for 1 minute to soften it. Once the greyboard was removed we blanched it to remove most of the excess water.

Results:
Some of the type got stuck to the greyboard which meant the greyboard was torn. To overcome this in the future I should add a layer of tissue paper between the woodtype and the greyboard.

Waited 24 hours for the greyboard to dry. Unfortunately as the greyboard dried it began to warp and crack. The greyboard also expanded which meant the debossing wasn't as deep as it was before.
We cut binding holes and put the cover onto the publication:

The debossing is clearly visible with a lot of natural light, however in dull light it is barely visible.
The warped greyboard doesn't add the structure and stability that we intended therefore we looked for an alternative solution.
Alternative
To further reinstate process we came up with the idea of imbedding the laser cut type forms into the publication. For the cover we used the large 'U' as it is a definitive character throughout our work. Although this doesn't add protection to the publication, it invites the reader to turn the typeforms over to reveal the content below:

Here Ed and I showed how we can problem solve effectively. I am really pleased with the outcome so far.
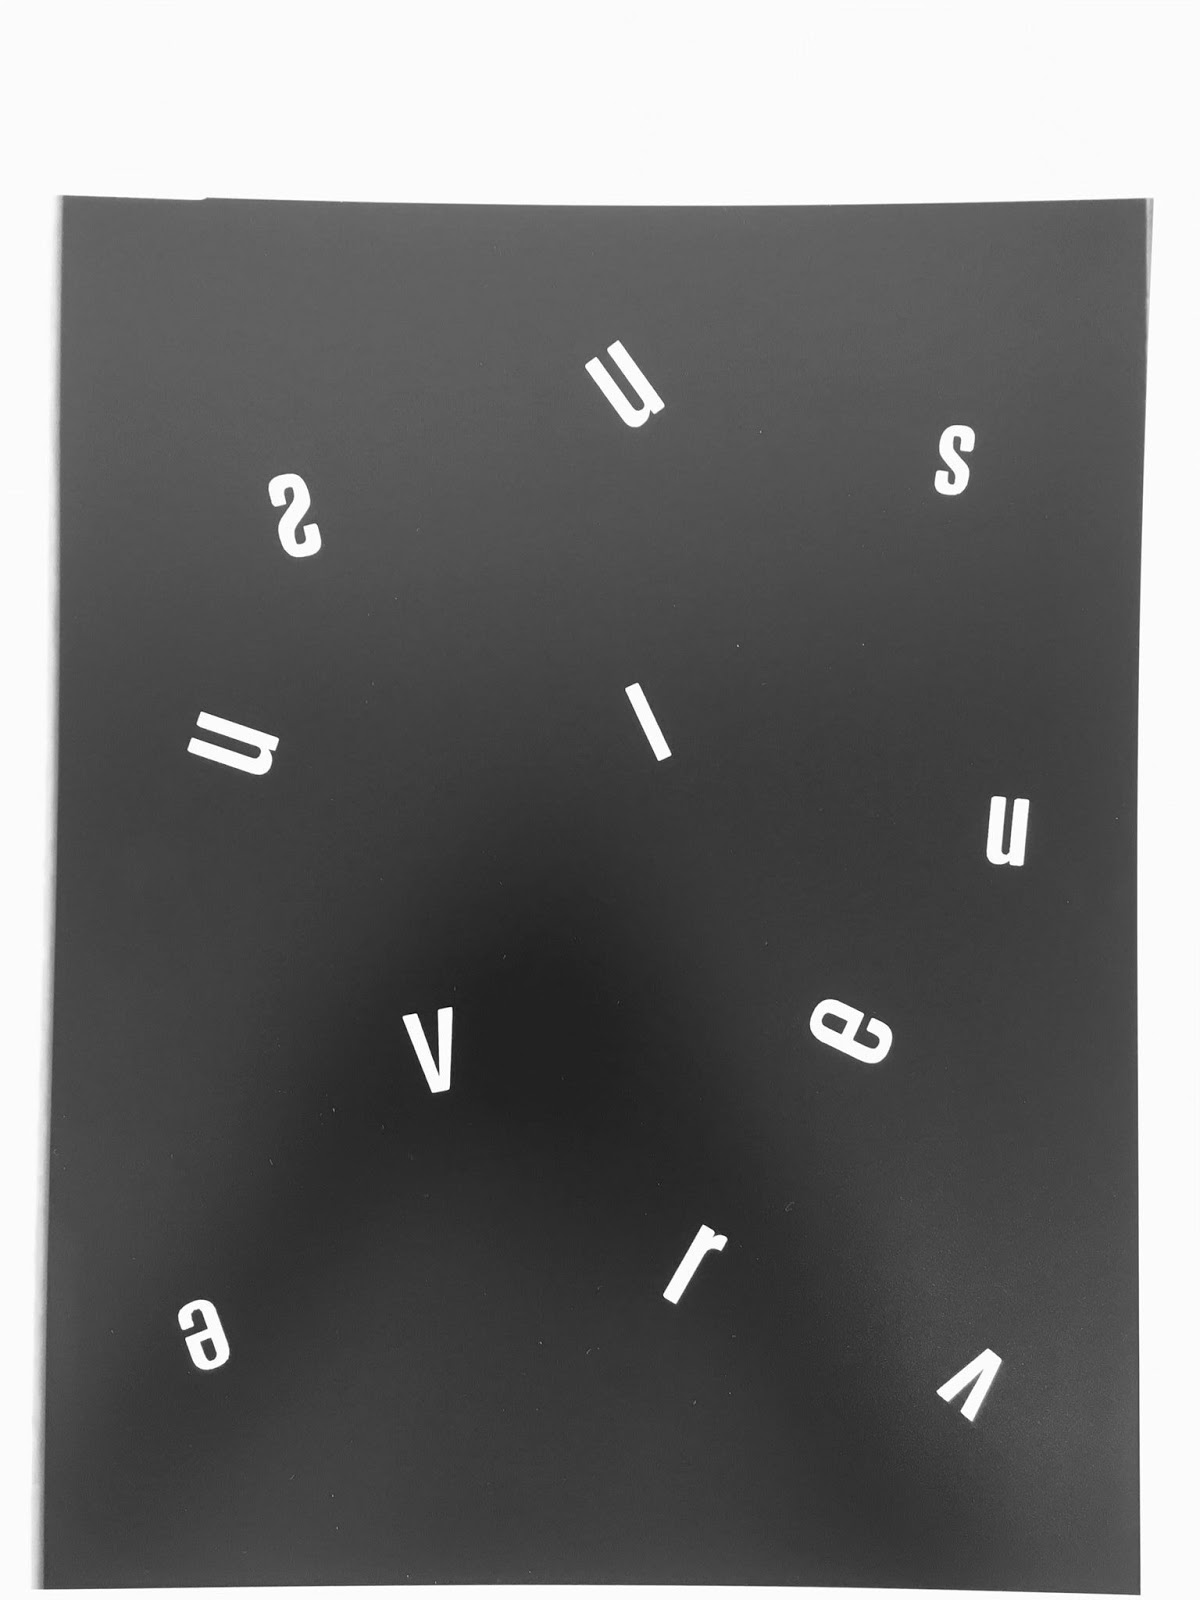
OUGD603 - Univers - Dark Room Typography
In order to replicate phototypesetting we booked ourselves into the dark room. My research into Man Ray's photograms inspired this concept.
Process:
Set the contrast to 3.5 and the aperture to f6
Focused the light referring to the edges of the rectangle.
Use the red filter to register the photographic paper - Shiny side up - within the light.
Place the letterforms on top of the paper in the desired composition.
In order to work out how long to expose the paper for, we created some test prints using a piece of card to block the light and moving it along each exposure.
Test Print
1: 2 second intervals
2: 0.5 second intervals


Optimum time is around 4-5 seconds
Immediate reaction - Clarity of type is HD
1: Test printing the type in order to get a taste of the aesthetic and quality of print.
2: Stood the type up to try create a shadow however it needs to be angled as the light hits the objects directly from the top.
3: Placed an 's' onto acetate, set the exposure time to 5 seconds, as the image is exposing we slid the type across the photographic paper. As a result we got a really subtle blur suggesting movement.


We had no composition guides or grids therefore we have to compose the type by eye.
Testing our design skills
Important to have a steady hand when compositing the type - This is particularly important when creating layers and movement to make sure the type is in line.
Compositions
Working manually with the type allowed us to composite freely and expressively. Created some space like compositions using the small point type and variations of the condensed weights. Focused on ordered chaos


Typographic sculpture using the black extended variations:

Typographic structures:
Composited the type on the photographic paper.
By lifting up the edges of the paper on either side allowed the type to naturally fall into place. Lightly shaking the paper allowed the letterforms to slot together to create these 'towers' of type balancing on each other:


Process informing design
Would be very hard to replicate this digitally
Cropping and layering large format type
R:


N:
Gradation of tone from using the card through the exposure time - Almost looks like a light:

Combined the large format type.
Cropped the letterforms to abstract the letterforms.
Filled the negative space/counters with small point type.


Type cascading down into a funnel:

Repetition


Overlaying large letterforms:

Reflection:
Gained a huge amount of positive feedback from peers and tutors.
Really enjoyed the process - Definitely aim to continue this in the future as there are still loads of possibilities to explore.
Enjoyable way to design
Autonomous
Surprising results
Process:
Set the contrast to 3.5 and the aperture to f6
Focused the light referring to the edges of the rectangle.
Use the red filter to register the photographic paper - Shiny side up - within the light.
Place the letterforms on top of the paper in the desired composition.
In order to work out how long to expose the paper for, we created some test prints using a piece of card to block the light and moving it along each exposure.
Test Print
1: 2 second intervals
2: 0.5 second intervals

Adjusted the aperture to allow less light through - This provided us with more control over exposure times:
3: 1 second intervals
4: 0.5 second intervals

Optimum time is around 4-5 seconds
Immediate reaction - Clarity of type is HD
1: Test printing the type in order to get a taste of the aesthetic and quality of print.
2: Stood the type up to try create a shadow however it needs to be angled as the light hits the objects directly from the top.
3: Placed an 's' onto acetate, set the exposure time to 5 seconds, as the image is exposing we slid the type across the photographic paper. As a result we got a really subtle blur suggesting movement.

Experiments - Manipulating the dark room process to create effects
1: Movement - Exposed the composition for 1 second x 4 times. After each exposure I moved the type to create a motion blur.
2: Exposed the composition for 4 seconds. I used a piece of card to block the light and moved it whilst it was exposing. This creates a smooth gradual gradation.
3: Layering the standard weight with the oblique version. Placed the regular on the bottom and the oblique on top and exposed for 2 seconds. After the first exposure I removed the oblique and exposed for another 2 seconds. The type on the bottom layer is sharper as it has had more time to expose. The oblique type is faded as it was only exposed for 2 seconds and the shadow isn't as strong because it was raised from the surface.

We had no composition guides or grids therefore we have to compose the type by eye.
Testing our design skills
Important to have a steady hand when compositing the type - This is particularly important when creating layers and movement to make sure the type is in line.
Compositions
Working manually with the type allowed us to composite freely and expressively. Created some space like compositions using the small point type and variations of the condensed weights. Focused on ordered chaos

Typographic sculpture using the black extended variations:

Typographic structures:
Composited the type on the photographic paper.
By lifting up the edges of the paper on either side allowed the type to naturally fall into place. Lightly shaking the paper allowed the letterforms to slot together to create these 'towers' of type balancing on each other:


Process informing design
Would be very hard to replicate this digitally
Cropping and layering large format type
R:

Exposed the V for 2 seconds
Overlaid the U and exposed for a further 2 seconds:

N:
Gradation of tone from using the card through the exposure time - Almost looks like a light:

Combined the large format type.
Cropped the letterforms to abstract the letterforms.
Filled the negative space/counters with small point type.


Type cascading down into a funnel:

Repetition


Overlaying large letterforms:

Reflection:
Gained a huge amount of positive feedback from peers and tutors.
Really enjoyed the process - Definitely aim to continue this in the future as there are still loads of possibilities to explore.
Enjoyable way to design
Autonomous
Surprising results
OUGD603 - Univers - Curating and Pagination
Ed and I collated all of the pages so far from letterpress, dark room photography and digital typesetting and tissue paper to further communicate manual design processes. This allowed us to plan out compositions to go on the reverse of the letterpressed compositions whilst creating a visual narrative through pagination.


Contents Page
We identified that we need to create a contents page to provide context to the outcome. Here we will create a short introduction and list the range of techniques and processes used to create the publication.
I wrote up an introduction statement to give the publication context:
Listed the techniques and processes used throughout the publication
Minimal composition to create more impact
Formal tone of voice

I wrote up an introduction statement to give the publication context:
Listed the techniques and processes used throughout the publication
Minimal composition to create more impact
Formal tone of voice

Cover Page
Suggested using grey board for the cover as it will sandwich the publication together whilst protecting the pages and providing structure to the oversized publication.
Using grey board aims to add tactility to the publication whilst also communicating process.
From experience black ink works nicely with grey board as the ink soaks into the board.
Subscribe to:
Comments (Atom)